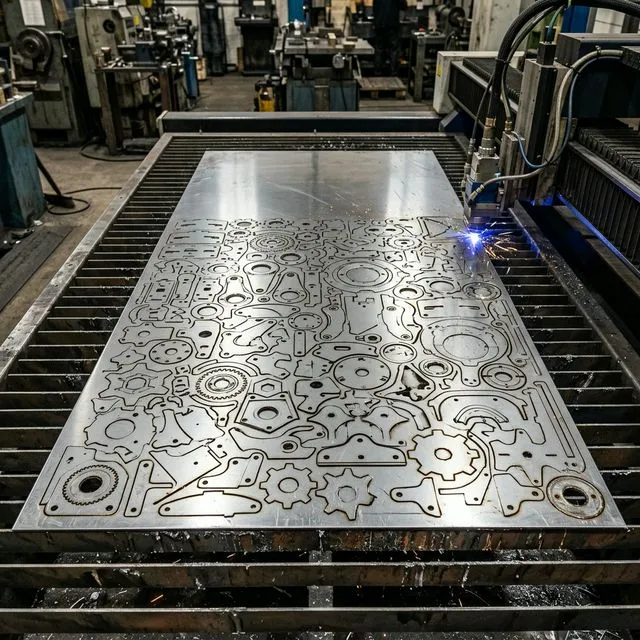
DXF Nesting Best Practices: 10 Rules Before You Auto-Nest
DXF Nesting Preflight Checklist
Run this DXF hygiene check before comparing nesting output. Bad geometry can erase software ROI by creating rejects, double cuts, unreliable common-line paths, and avoidable cycle time.
Open contour
Close endpoints with a defined tolerance before import so the nesting engine can identify part boundaries.
Duplicate geometry
Remove overlapping lines and copied entities that cause double cutting, heat damage, and false perimeter length.
Spline conversion
Convert splines to polylines with a controlled chord tolerance before handing files to CAM or nesting software.
Layer mapping
Separate external cuts, internal cuts, marking, engraving, and bend references so parameters map cleanly.
1. Close All Contours — The #1 Rule
Open contours are the single most common cause of nesting failures. Nesting software must identify closed boundaries to determine part geometry. Even a 0.01mm gap between endpoints will cause the part to be rejected or incorrectly nested.
Common Problems
Solutions
PEDIT → Join (tolerance 0.01mm)AUDIT command followed by OVERKILL before every DXF export. This catches 90% of geometry issues automatically.2. Remove Duplicate and Overlapping Entities
Duplicate lines cause the laser to cut the same path twice, wasting time and risking serious thermal damage to the material. Furthermore, overlapping entities destroy the modern nesting software's ability to place automated micro-joints (tabs), which are absolutely critical for preventing part tip-ups during high-speed, unmanned cutting in 2026.
OVERKILL command (tolerance 0.001mm)MOVE instead when repositioning3. Convert Splines to Polylines
Splines (NURBS curves) are mathematically complex and many nesting and CNC controllers handle them poorly. Converting to polylines with appropriate chord tolerance ensures consistent results across all platforms.
4. Use Layer-Based Cut Parameter Assignment
Organize your DXF by layers to separate different cutting operations. Most nesting software maps layers to cutting parameters automatically, enabling mixed operations (cutting, engraving, marking) in a single nest.
| Layer Name | Color | Operation | Typical Settings |
|---|---|---|---|
| CUT | Red (1) | Through cut (external) | Full power, standard speed |
| CUT_INTERNAL | Yellow (2) | Internal holes and cutouts | Same as CUT, processed first |
| ENGRAVE | Green (3) | Surface engraving | Reduced power, higher speed |
| MARK | Cyan (4) | Part ID marking | Low power, fast scan |
| BEND | Magenta (6) | Bend line reference (no cut) | Not processed — reference only |
5. Optimize Small Features for Nesting Density
Small features (tiny holes, text, decorative details) create "exclusion zones" around parts that reduce nesting density. The nesting software must maintain minimum spacing around these features, effectively making each part occupy more sheet area than its actual boundary.
6. Set Correct Units and Scale
DXF files are unit-agnostic — geometry is stored as dimensionless numbers. This causes frequent scale errors when files are created in inches but imported in millimeters (or vice versa). A part designed at 100mm will appear at 100 inches if units are mismatched — a 25.4× error.
- Set AutoCAD
INSUNITSto 4 (millimeters) before drawing - Include a reference dimension (e.g., 100mm square) on a separate layer for verification
- Always verify part dimensions in nesting software after import
- Standardize your shop on one unit system (mm is industry standard)
7. Include Kerf Compensation in Design
The laser beam removes material (kerf width typically 0.15-0.5mm for fiber lasers). For precision parts, you must decide whether kerf compensation is applied in CAD or by the nesting/controller software. Double compensation is a common error. Use our Kerf Calculator to determine the correct compensation for your setup.
Method A: CAD Compensation
Method B: Software Compensation (Recommended)
8. Clean Up Non-Geometry Entities
Dimensions, text annotations, hatching, viewport boundaries, and block references can interfere with nesting import. Even if they don't cause errors, they increase file size and processing time.
- Delete all dimensions (
DIMSTYLE→ Purge → Delete objects) - Explode all blocks to base geometry
- Remove all hatching and fills
- Flatten 3D geometry to 2D (
FLATTENcommand) - Delete all text on cutting layers (keep on MARK layer if needed)
- Run
PURGE→ All to remove unused definitions - Run
AUDIT→ Fix all errors
9. Export in the Right DXF Version
Not all DXF versions are created equal. Newer versions support more entity types but have lower compatibility with CNC controllers and nesting software.
| DXF Version | Compatibility | Recommendation |
|---|---|---|
| R14 / 2000 | Universal (99%+ software) | Best for production |
| 2007 / 2010 | High (90%+ software) | Good if you need mesh/solid support |
| 2013 / 2018+ | Limited (70% software) | May cause import errors |
10. Validate for Automation and Common-Line Cutting
In 2026, manual nesting is obsolete. Your DXF must be pristine condition to support AI-driven features like Common-Line Cutting (where two parts share a single laser cut to save gas and time). Establish a strict validation checklist that every DXF file must pass before it enters the nesting queue. Catching errors in CAD saves 10-50× the time compared to software crashes during automated batch processing.
Frequently Asked Questions
Why does my nesting software say "Open Contour" on a closed shape?
This is the most common DXF error. It means there is a microscopic gap between two line endpoints (often less than 0.001mm), or two lines are crossing rather than joining. In AutoCAD, visually it looks closed, but mathematically it is not. Run the PEDIT command with the Join parameter (setting a 0.01mm gap tolerance) to force the endpoints together.
Can I use DXF splines for laser cutting?
No, splines should always be avoided for laser cutting. Splines are complex mathematical curves that many CNC controllers and nesting algorithms cannot interpolate, resulting in jerky laser head movement, faceted edges, or complete file rejection. Always convert splines to polylines with a chord tolerance of 0.05mm to 0.1mm before export.
What is the best DXF version to export for nesting?
In 2026, DXF R14 or AutoCAD 2000 format remains the undisputed industry standard for 2D laser cutting profiles. Do not use newer DXF 2013 or 2018 formats, as they include metadata, 3D definitions, and proprietary object data that frequently crash older or specialized nesting software parsers.
How do small features affect nesting efficiency?
Small features create larger exclusion zones around parts, reducing nesting density. Remove holes smaller than the material thickness from cutting DXFs and use post-processing (drilling, punching) instead. Simplify text engravings to single-line fonts. These optimizations typically recover 2-5% material utilization.
Related Tools & Guides
Nesting Optimization Guide
Complete nesting strategy with ROI analysis
Nesting Efficiency Calculator
Calculate material utilization and savings
Kerf Calculator
Determine kerf width for accurate compensation
Cutting Time Calculator
Estimate cycle time from part geometry
Cutting Speed Chart
Speed data for nesting time estimates
Cost Estimator
Calculate material waste cost impact
This guide is based on production best practices from facilities using SigmaNEST, ProNest, Lantek, and Radan nesting software. Specific commands reference AutoCAD 2024+ but equivalent functions exist in all major CAD platforms. Always verify your specific nesting software documentation for import requirements.